Title here
Summary here
Interactive access is provided using JupyterLab. See the JupyterLab User Guide for general documentation an tutorials on how to use the web interface.
Each user’s JupyterLab instance inside JupyterHub is running in a separate virtual environment (Docker image). When you access the Jupyter page you will presented with a choice of server types from which to select one. They differ mainly in the resources that are allocated (number of CPUs and memory). In all of them a default Python environment is provisioned, including the most popular Python packages used for data science.
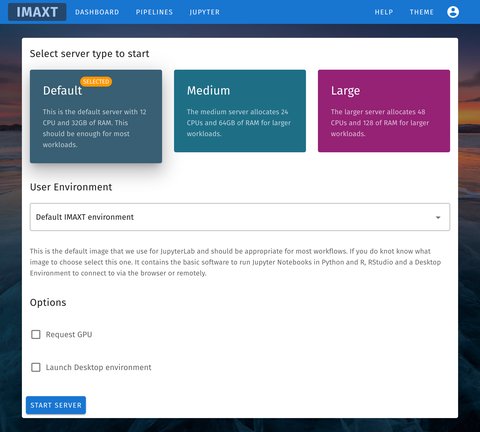
The user environment define the packages and applications that are available to the user. If unsure leave the default IMAXT user environment. Then click in Start Server.
After a few seconds the environment should be scheduled and you will see a page smilar to the one below.
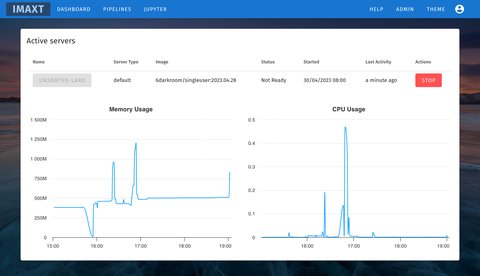
This shows a list of the active servers (currently limited to one server per user), name, status and additional information together with a button to stop the server. The name is initially grayed out until the provisioning of the server ends and becomes ready. The charts show the resources (memory and CPU) consumed by the user’s server in the last four hours.
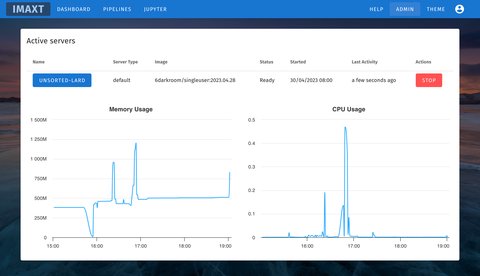
When the server is ready, the name will become blue and you will be able to access it clicking on the button.
In order to end your Jupyter session, click in the STOP button. This will end whatever job is running in your Jupyter environemnt.
It is a good practice to stop your server when you do not need it. This releases the resources for other users.
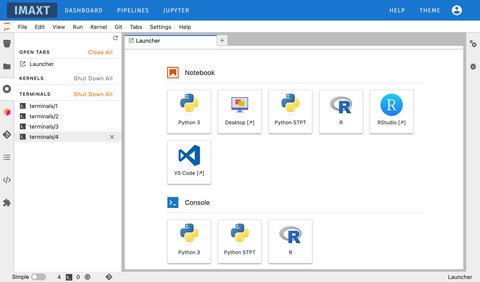
The JupyterLab interface consists of a main work area containing tabs of documents and activities, a collapsible left sidebar, and a menu bar. The left sidebar contains a file browser, the list of running kernels and terminals, the command palette, the notebook cell tools inspector, and the tabs list.
The menu bar at the top of JupyterLab has top-level menus that expose actions available in JupyterLab with their keyboard shortcuts. The default menus are:
The left sidebar contains a number of commonly-used tabs, such as a file browser, a list of running kernels and terminals, the command palette, and a list of tabs in the main work area:
The left sidebar can be collapsed or expanded by selecting “Show Left Sidebar” in the View menu or by clicking on the active sidebar tab.
The main work area in JupyterLab enables you to arrange documents (notebooks, text files, etc.) and other activities (terminals, code consoles, etc.) into panels of tabs that can be resized or subdivided.
Jupyter notebooks are documents that combine live runnable code with narrative text (Markdown), equations (LaTeX), images, interactive visualizations and other rich output.
Notebook files have the extension .ipynb to distinguish them from text files or other Python scripts but can be exported as HTML, PDF or Python.
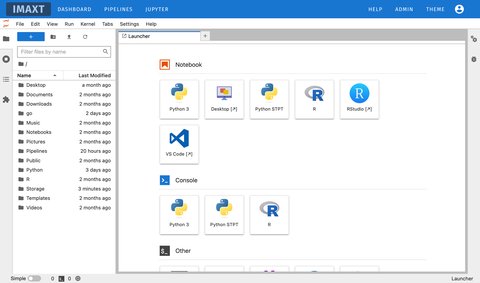
You can create a new notebook in several ways. From the main workspace launch bar click on one of the icons representinf the language you want to write your code in. E.g. in order to write a notebook in Python click on Python 3. Each of the programming languages available is called a Kernel.
Alternatively you can select File -> New -> Notebook from the menu bar or click on the + button in the file browser and then selecting a kernel.
When you create a notebook it will be assigned a name like Untitled.ipynb. Right click on the name and change it to something more meaniful.
When you first create a notebook it is named Untitled.ipynb. It is recommended to rename it to something more meaninful. A good pratice is to name it as e.g. 2020-07-06-rna-experiment-plot.ipynb or something similar so that you can find it easily later.
More information about notebooks can be found in the Notebooks official documentation.
Each notebook contains a combination of text, code and figures that tell a story about some analysis. Each piece of code can be distributed in cells and each cel l can be run independetly.
While all operations can be done using the menu or the mouse right button there are a few keyboard shortcuts that are useful to know in order to speed things up.
If you press Esc and Return alternately, the outer border of your code cell will change from gray to blue. These are the Command (gray) and Edit (blue) modes of your notebook. Command mode allows you to edit notebook-level features, and Edit mode changes the content of cells. When in Command mode (esc/gray),
The Jupyter terminal provides full support for system shells using bash. You can run anything in your system shell with a terminal, including Python or R scripts or data transfer programs. The terminals run on the system where the Jupyter server is running, with the privileges of your user.
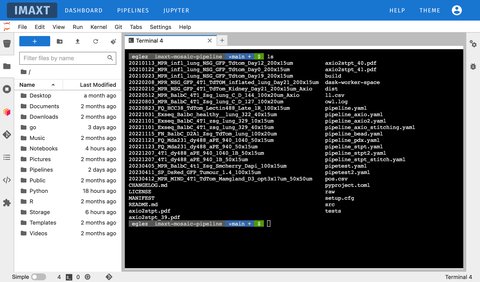
You can open a terminal from the Launcher (under the Other section) or from the menu File -> New -> Terminal.
Closing a terminal tab will leave it running on the server. You can re-open it using the the left sidebar: