Title here
Summary here
Users code should reside within Projects. Once a Project is set up you can add files to it, remove files from it, share it with other users and delete it. You can also clone a Project to another machine and pull changes from the remote repository.
All files in a Project are backed up to a remote Git repository. This means that you can always recover a previous version of a file or a deleted file.
The Projects repository is not a replacement for the Data repository. The Projects repository should not be used to store large datasets.
Manage your projects with the pvc (Project Version Control) command.
This only needs to be done once in order to make sure that the configuration is correct and you have access to the remote repository.
pvc setup
Username (demo):
Email (demo@darkroom): demo@ast.cam.ac.ukIn order to create a new project use the pvc create command. This will ask for the title of the project, a short name that identifies uniquely the project and the path to store the project.
pvc create
Project title: My Awesome Project
Project short name (my-awesome-project):
Project path (/home/demo): /home/demo/Projects/
The above command will create a directory /home/demo/Projects/my-awesome-project and initialize a git repository in it. The project will be added to the projects repository and pushed to the server.
By default all notebooks that are saved in the project directory using JupyterLab are automatically added to the git repository. You can change this behaviour by removing the .auto file in the project directory. Other files will need to be added manualy to the git repository following the instructions below or directly from Jupyterlab as explained in Projects in JupyterLab.
The short name has to be unique across all your projects and cannot contain spaces or special characters.
pvc is a thin wrapper around git and you can use git commands directly in the project directory.
In order to list the projects you have access to, use the pvc list command.
pvc listAfter the creation of a project you can add files to it. The files will be added to the Git repository with the pvc add command from within the Project directory.
To add all files in the current directory use the following command:
pvc add .To add a specific file use the following command:
pvc add my_file.txtThe pvc add command only adds the current version of the file to the Git repository. Whenever the file is changed you need to add it again to the git repository if you want to save a new version.
Sometimes we do not need to track all the files in a project. For example, we might want to ignore the data files that are too large to be stored in the git repository. In order to do that we can create a .gitignore file in the project directory and add the files we want to ignore in it. This is done with the following command:
pvc ignore data.csvBy default files larger than 100MB cannot be stored in the Projects repository. If you need to store larger files please contact the system administrator.
In order to remove files from a project use the pvc remove command. This will remove the files from the local git repository and the remote git repository.
Previous versions of the file will still be available in the git repository.
pvc remove my_file.txtIn order to delete a project use the pvc delete command. This will delete the project from the local git repository and the remote git repository.
pvc delete my-awesome-projectBy default the files in the Project repository are private to each user. In order to share a project with other users you need to add them as collaborators. This can be done with the pvc share command.
pvc share my-awesome-project anotheruserWhen this is done the user anotheruser will be able to clone the project repository and push changes to it.
Use pvc unshare to remove a collaborator from a project.
In order to clone a project use the pvc clone command. This will clone the project repository to the current directory.
pvc clone demo/my-awesome-projectIn order to pull changes from a project use the pvc pull command. This will pull the changes from the remote git repository to the local git repository.
pvc pullPulling is useful when you want to get the latest changes from the remote repository. For example, if you are working on a project from multiple machines you can pull the changes from the remote repository to the local repository in order to get the latest changes.
Another example is when you are working on a project with other users. When a collaborator pushes changes to the remote repository you can pull the changes to your local repository in order to get the latest changes.
In this case it is possible that the pull command fails because of conflicts. This means that some files have been changed both in the remote repository and the local repository. In order to resolve the conflicts there are different options:
pvc pull --overwrite: overwrite the local changes with the remote changes. Local changes will be lost.pvc pull --stash: stash the local changes and pull the remote changes. Local changes will be saved in a stash.To create a backup of your code as a new project, you can use pvc backup command. In this case open a terminal and navigate to the directory where your code is located. For example if your code is in $HOME/Notebooks/my-awesome-project, navigate to $HOME/Notebooks and run the following command:
pvc backup my-awesome-projectWhen finished add the files to the repository:
pvc add .These commands will create a backup of your project and store it in a remote Git repository.
The Projects repository is integrated with JupyterLab. This means that you can create a new JupyterLab notebook in a project directory and add the notebook to the git repository. You can also edit existing notebooks and commit the changes to the git repository.
By default Python notebooks saved in a project directory are automatically added to the git repository. You can change this behaviour by removing the .auto file in the project directory.
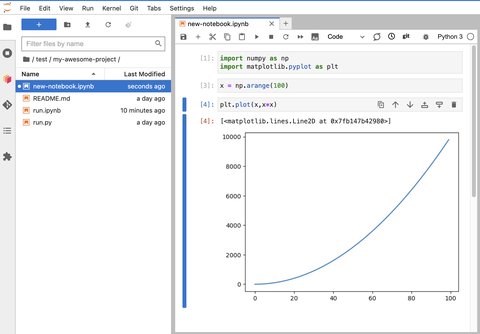
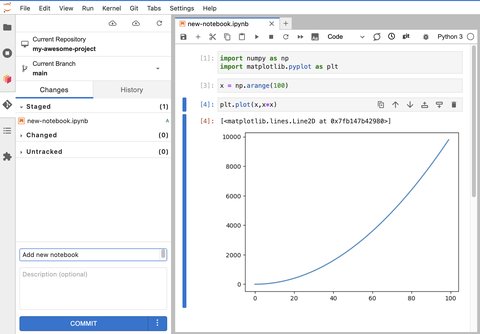
The following screenshot shows the JupyterLab interface with a new notebook created in a project directory.
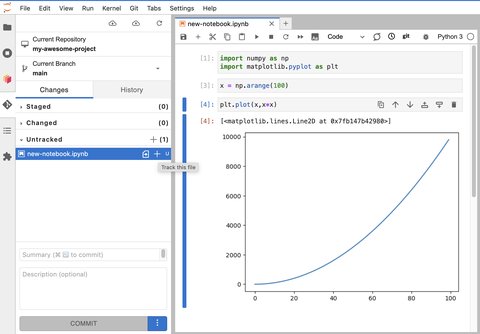
If we click in the Git extension we can see that the notebook is not yet tracked by git. This means that the notebook is not yet added to the git repository.

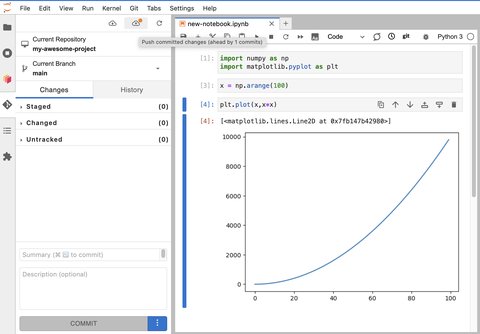
If we click in the + button next to the file name we can add the notebook to the git repository.
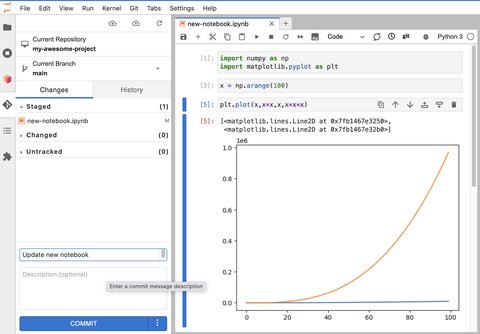
Then add a commit message and click the Commit button to commit the changes to the local git repository.
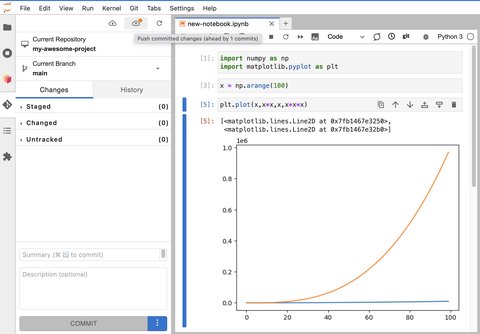
Finally, click the Push button to push the changes to the remote git repository.
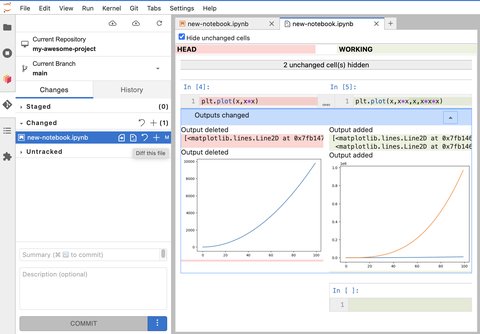
If we go ahead and make some changes to the notebook, and save the notebook, we can see that the Git extension shows that the notebook has been modified. It is now in the changed section. We can click in the diff button to see the changes between the current version and the previous version.
In order to commit the changes to the local git repository we need to click the + button next to the file name.
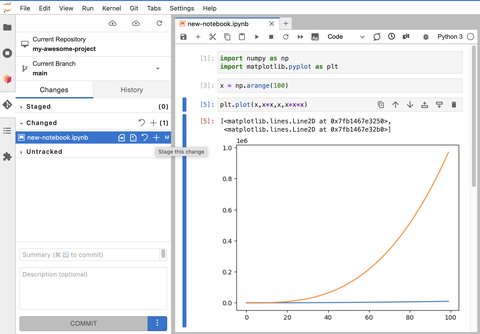
Then add a commit message and click the Commit button to commit the changes to the local git repository.
Finally, click the Push button to push the changes to the remote git repository.
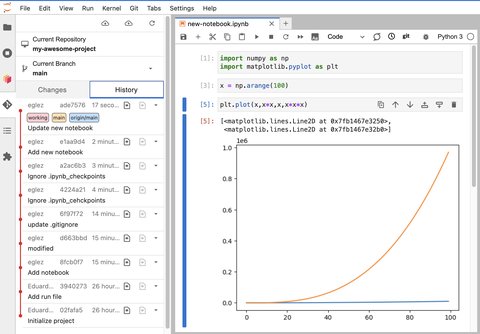
There is a history of all changes to the notebook. We can see the history by clicking the History button.
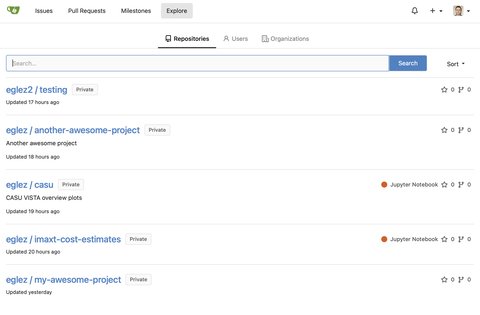
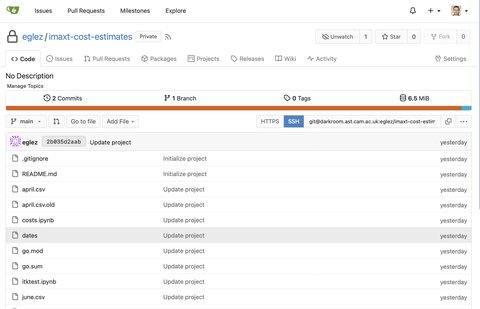
You can browse all your projects and files in the User Interface. You can also edit files directly in the browser and commit the changes to the remote git repository.
The User Interface is powered by Gitea. The following screenshots shows the list of projects (repositories) and the files in a project.